
A Fun Guide to Geographic Map Sketching For Grade 3
Learning Outcomes
Students will be able to (SWBAT) do the following by the end of this lesson:
-
What is a geographic map sketching & why should you care?.
-
Recognize different techniques & materials used in drawing geographic maps
-
Using different approaches to sketch their own geographic maps
-
Recognize how geographic map sketches help to frame paradigms of all the areas & the relations among them.

Introduction to Geographic Map Sketching
It helps people visualize landscapes, routes, & locations in a simplified way. Sketch maps focus on these features, which makes them much easier to read than traditional maps that may give even more details. It is especially helpful in education, town planning, & environmental studies.
In the end, map sketching is not just about drawing but is more about understanding the geography of an area & communicating this information visually. As an artist, or as a bottom-line loving student interested in geography, map sketching is a great way to start understanding what the world looks like.
The Importance of Map Sketching
Map sketching is also essential in several disciplines. – Why geographic map sketching is important:
-
Visualization: Sketch maps to people visualize landscapes & spatial relationships to different places. This is particularly useful in the context of students learning geography or just any person to understand an area.
-
Planning: A sketch map can be used to plan a trip or project. Hikers might do this with sketches of trails when navigating through unfamiliar territory.
-
Creativity: A key reason for using geographic map sketching is that it often encourages creativity in mapping and in storytelling about maps. This can especially be appealing to those students who are interested in art & storytelling.
-
Communication: Maps can be used to report information about places to other people, thus serving as effective tools in presentations & reports. A well-executed sketch can present complicated information clearly & easily.
-
Learning Tool: Students who create map sketches are engaging in a form of learning that solidifies concepts around geography like scale, distance & spatial relationships.
What is Geographic Map Sketching?
In this sketch, we simply create a map of a geographical area with quality geographical features such as Mount Rainer, a river or even the roads in the area. Such sketches can be used for several functions from aiding students in grasping geography to assisting researchers with visualizing spatial information.
Characteristics of Geographic Map Sketches
-
Simplicity: Rather than worrying about all the details you might find on a map, geographic map sketches tend to focus on what matters.
-
Flexibility: You can also change sketches on the fly based on new ideas or pieces of information.
-
Artistic Expression: Map sketches can be personalized, giving a sense of uniqueness to each map.
-
Informality: These maps do not need to follow exacting cartographic standards; they can be informal & expressive.
Types of Geographic Map Sketches
-
Topographic Sketches: These are used to represent elevation changes in a terrain using contour lines or shading techniques.
-
Thematic Maps: These display specific themes such as population density, climate zones, or land use.
-
Route Maps: These show the roads or routes taken during a trip or exploration.
-
Fantasy Maps: These are fictional maps that are common in storytelling or gaming, as they represent invented regions & fictitious elements.
Materials for Geographic Map Sketching
Materials needed for your geography map sketch. Some of the common sketching tools for maps are:
|
Material |
Description |
|
Pencils |
They way graphite pencils work makes them ideal for quick preliminary sketches since they can easily be adjusted or erased. Use various hardness settings (H for fine lines & B for darker areas) |
|
Colored Pencils |
Visualize-- these are used on the map to give colour to different features, allowing you to differentiate e.g blue = water, green = forests. |
|
Markers |
Permanent markers can outline key elements clearly; they work well to make features pop in the map. |
|
Sketchbooks |
A dedicated space for your drawings; pick one with high-quality paper that won’t bleed from various mediums. |
|
Erasers |
Important for fixing errors made when drawing; kneaded erasers are particularly effective because they pick up graphite without harming the surface of the paper. |
Optional Materials
-
Rulers: To use when outlining roads or borders to draw straight lines.
-
Compasses: Handy for drawing circular details, such as lakes or ponds.
-
Watercolors or Paints: For adding a more creative artistic element to your maps.
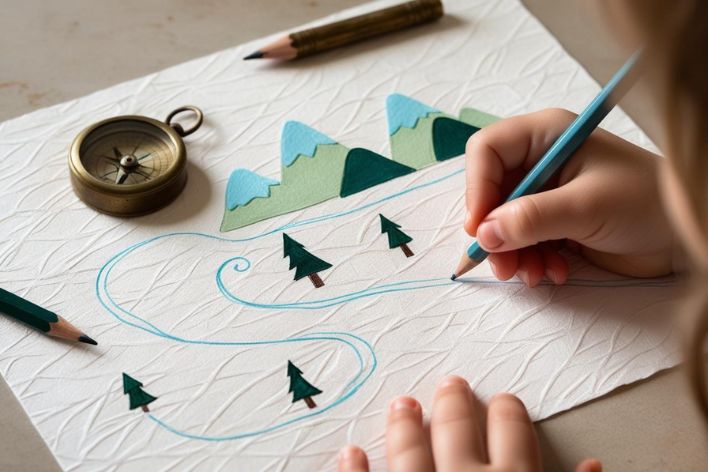
Basic Techniques for Geographic Map Sketching
Now that we have our materials all set let’s dive into some tutorial methods that will allow you to begin creating accurate Geo map sketches!
1. Outline the Area
The first step is to draw an outline of the main area you want to draw. It could be a city, a national park, or even an imaginary land. Use light strokes with a pencil so you can change it if needed.
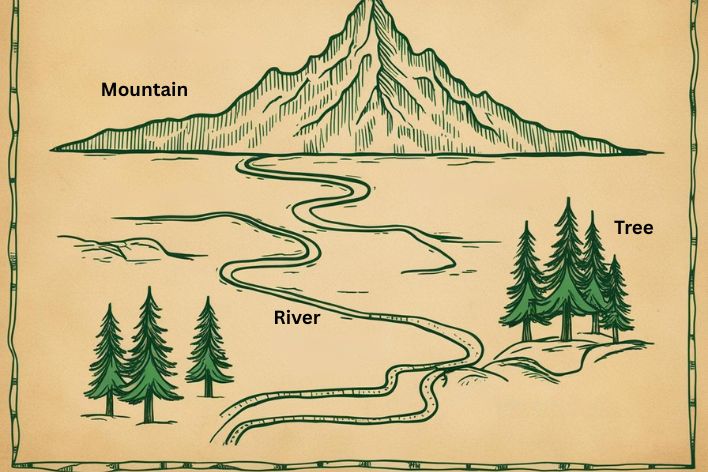
2. Add Major Features
Add any major landforms including mountains, rivers, lakes & roads. Draw simple shapes, such as triangles for mountains (to show pointed peaks) and wavy lines for rivers (to show flow).
Example:
-
At one edge of your paper, draw a triangle to illustrate a mountain range.
-
Add rivers that flow from your mountains as wavy lines with the curving side facing down, toward the bottom of your page.
3. Incorporate Landmarks
Fill in key destinations like cities, parks, or historical landmarks. You might depict cities with little circles or squares; parks could be marked with green patches or tree symbols.
Example:
-
Make tiny circles in where the city is.
-
Outdoor Parks You can use green symbols (like small trees) to represent parks in your area.
4. Use Symbols
Create symbols for features (E.g., trees for forests, waves for water.) Making your map more organized & visually appealing.
Example:
-
Draw a triangle atop a rectangle to represent forests; this is a simple tree symbol.
-
Use blue wavy lines with small dots below them to represent lakes or seas.
5. Label Your Map
Use bindable names to identify each feature on your map. It should be in a readable font or handwriting so that anyone viewing the map can read it easily.
Example:
-
Next to your triangle symbol, write “Mountains.”
-
Where known label rivers by name (ie, “River X”).
6. Add Details
Add details like roads, paths & other smaller features that add to the overall appearance of your map. Dashed lines can represent roads, dotted lines can indicate paths.
Example:
-
Let me use an example & connect it to a road with dashed lines between the cities.
-
Dotted lines pulling into parks off main roads.
7. Color Your Map
You can also color your map using colored pencils or markers. After you finish drawing. This can separate different regions (e.g., green for forests, blue for water).
Example:
-
Color mountains brown or gray.
-
Lakes with blue & forests the green.
Real-Life Examples with Images
Geographic map sketches aren’t just for traditional cartography anymore:
Educational Maps
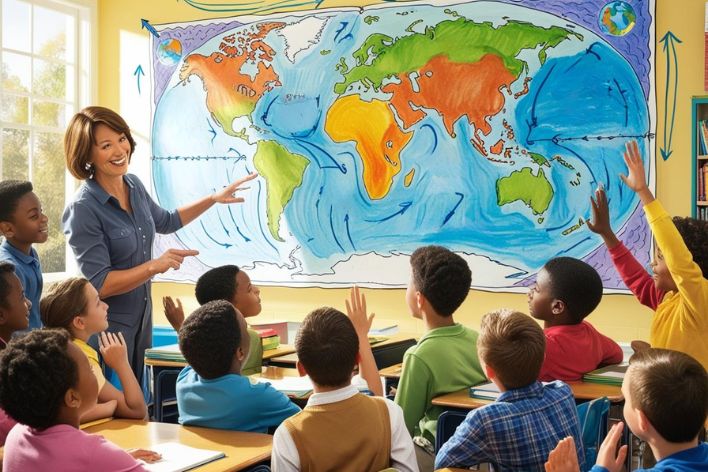
In classrooms, teachers commonly use sketches of maps in order to teach students about geography & spatial relationships. These maps illustrate climate zones or historical events and are used during lessons.
Environmental Studies
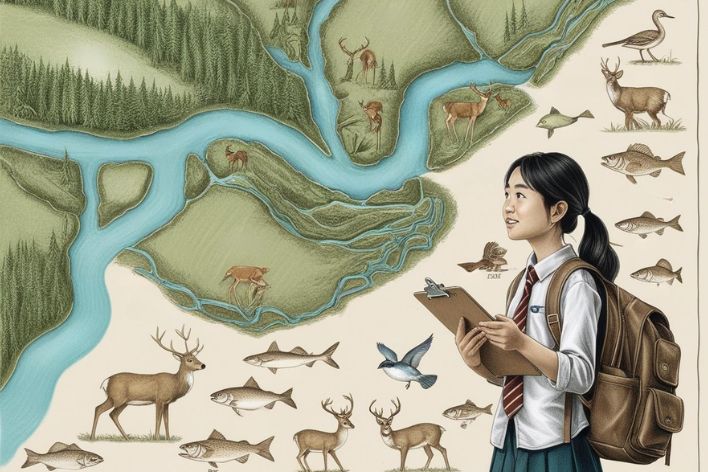
Scientists may be able to plot sketch maps of ecosystems to help visualize the biodiversity, or changes in the environment over time. Such maps can illuminate key habitats & distributions of species.
Planning Maps
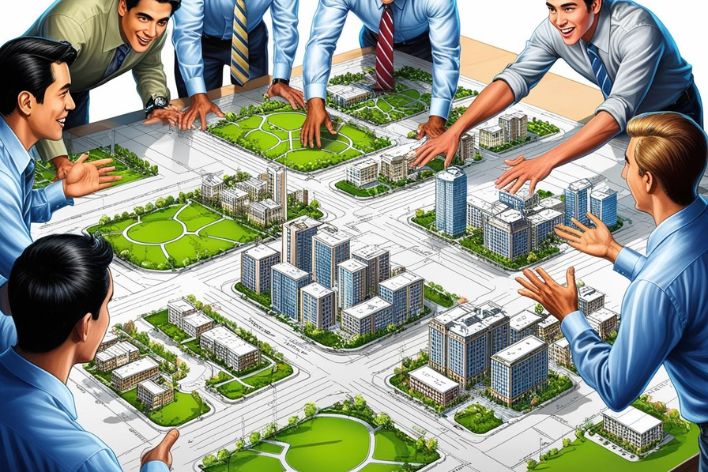
Urban planners make rough drafts of city maps to visualize planned developments & their interaction with existing spaces. These sketches help stakeholders visualize how new projects will integrate into existing environments.
Fun Facts About Geographic Map Sketching
Here are a few fun facts about geographic map sketching:
|
Fun Facts |
|
Ancient world maps are thought to date back thousands of years! |
|
There are even hand-drawn maps by many famous explorers throughout history! |
|
Well, sketch maps tend to be more flexible than traditional maps; they can be adjusted quickly! |
|
Some prominent artists including J.R.R. Tolkien even produced supplementary fantasy maps when writing their stories! |
Basic Steps Chart for Geographic Map Sketching
Here’s a summary table that outlines the basic steps of geographic map sketching:
|
Step |
Description |
|
Outline |
Sketch the overall shape of the region |
|
Major Features |
Add mountains, rivers, lakes |
|
Landmarks |
Include cities & significant places |
|
Symbols |
Develop symbols for easy identification |
|
Label |
Clearly label each feature |
|
Details |
Add roads & paths |
|
Color |
Use colors to differentiate areas |
Conclusion
Sketching the geographical map will help you enjoy and learn new practical skills related to geography & navigation at the same time. Learning to develop your own geospatial maps can inspire inventions and teach a lot about the topography & relativity.
Students should be encouraged to practice sketching out maps of their neighborhoods or imagined worlds! So, not only does it improve artistic skills, but also a very fun way to learn more geography!
FAQs
What truly is a sketch map in geography?
A sketch map is freehand drawing which shows the important features of a site without any consideration of an accurate scale.
How to make a geographical map?
Draw the outlines of an area, add major elements like rivers and mountains, label them, and finally, use symbols along with color for other indicators.
What is defined as a contour line?
Contour lines connect points of equal elevation and thus shape the land on a map.
What defines a geographic map?
Geographic maps are visual presentations of physical features and organization of a given area on the surface of Earth.
Understanding the world starts with the environment around us. To see how Orchids The International School brings EVS to life, reach out to our admissions team.
Admissions Open for 2026-27
What type of concept pages would you prefer?
CBSE Schools In Popular Cities
- CBSE Schools in Bangalore
- CBSE Schools in Mumbai
- CBSE Schools in Pune
- CBSE Schools in Hyderabad
- CBSE Schools in Chennai
- CBSE Schools in Gurgaon
- CBSE Schools in Kolkata
- CBSE Schools in Indore
- CBSE Schools in Sonipat
- CBSE Schools in Delhi
- CBSE Schools in Rohtak
- CBSE Schools in Bhopal
- CBSE Schools in Aurangabad
- CBSE Schools in Jabalpur
- CBSE Schools in Jaipur
- CBSE Schools in Jodhpur
- CBSE Schools in Nagpur
- CBSE Schools in Ahmednagar
- CBSE School In Tumkur


Orchids The International School is one of India's leading chains of CBSE and ICSE schools, with 110+ schools across the country.